How To Install And Use Premade Coils On Your RDA

How To Install & Use Premade Coils On Your RDA

Building coils can be an intimidating and daunting task, but that doesn’t mean they are completely out of the realm of possibility. They’re a great way to vape e-liquid, although require a slightly different method to use properly. Due to the complexity, rebuilding your coils is recommended for advanced vapers and requires a knowledge of electronics and Ohm’s Law.

If you’re interested in rebuilding, we’d recommend getting yourself some pre-built coils to use in your RDA. From regular and simplified wound coils, to the more advanced claptons and hive coils, we stock a wide range to suit every advanced vaper’s needs.

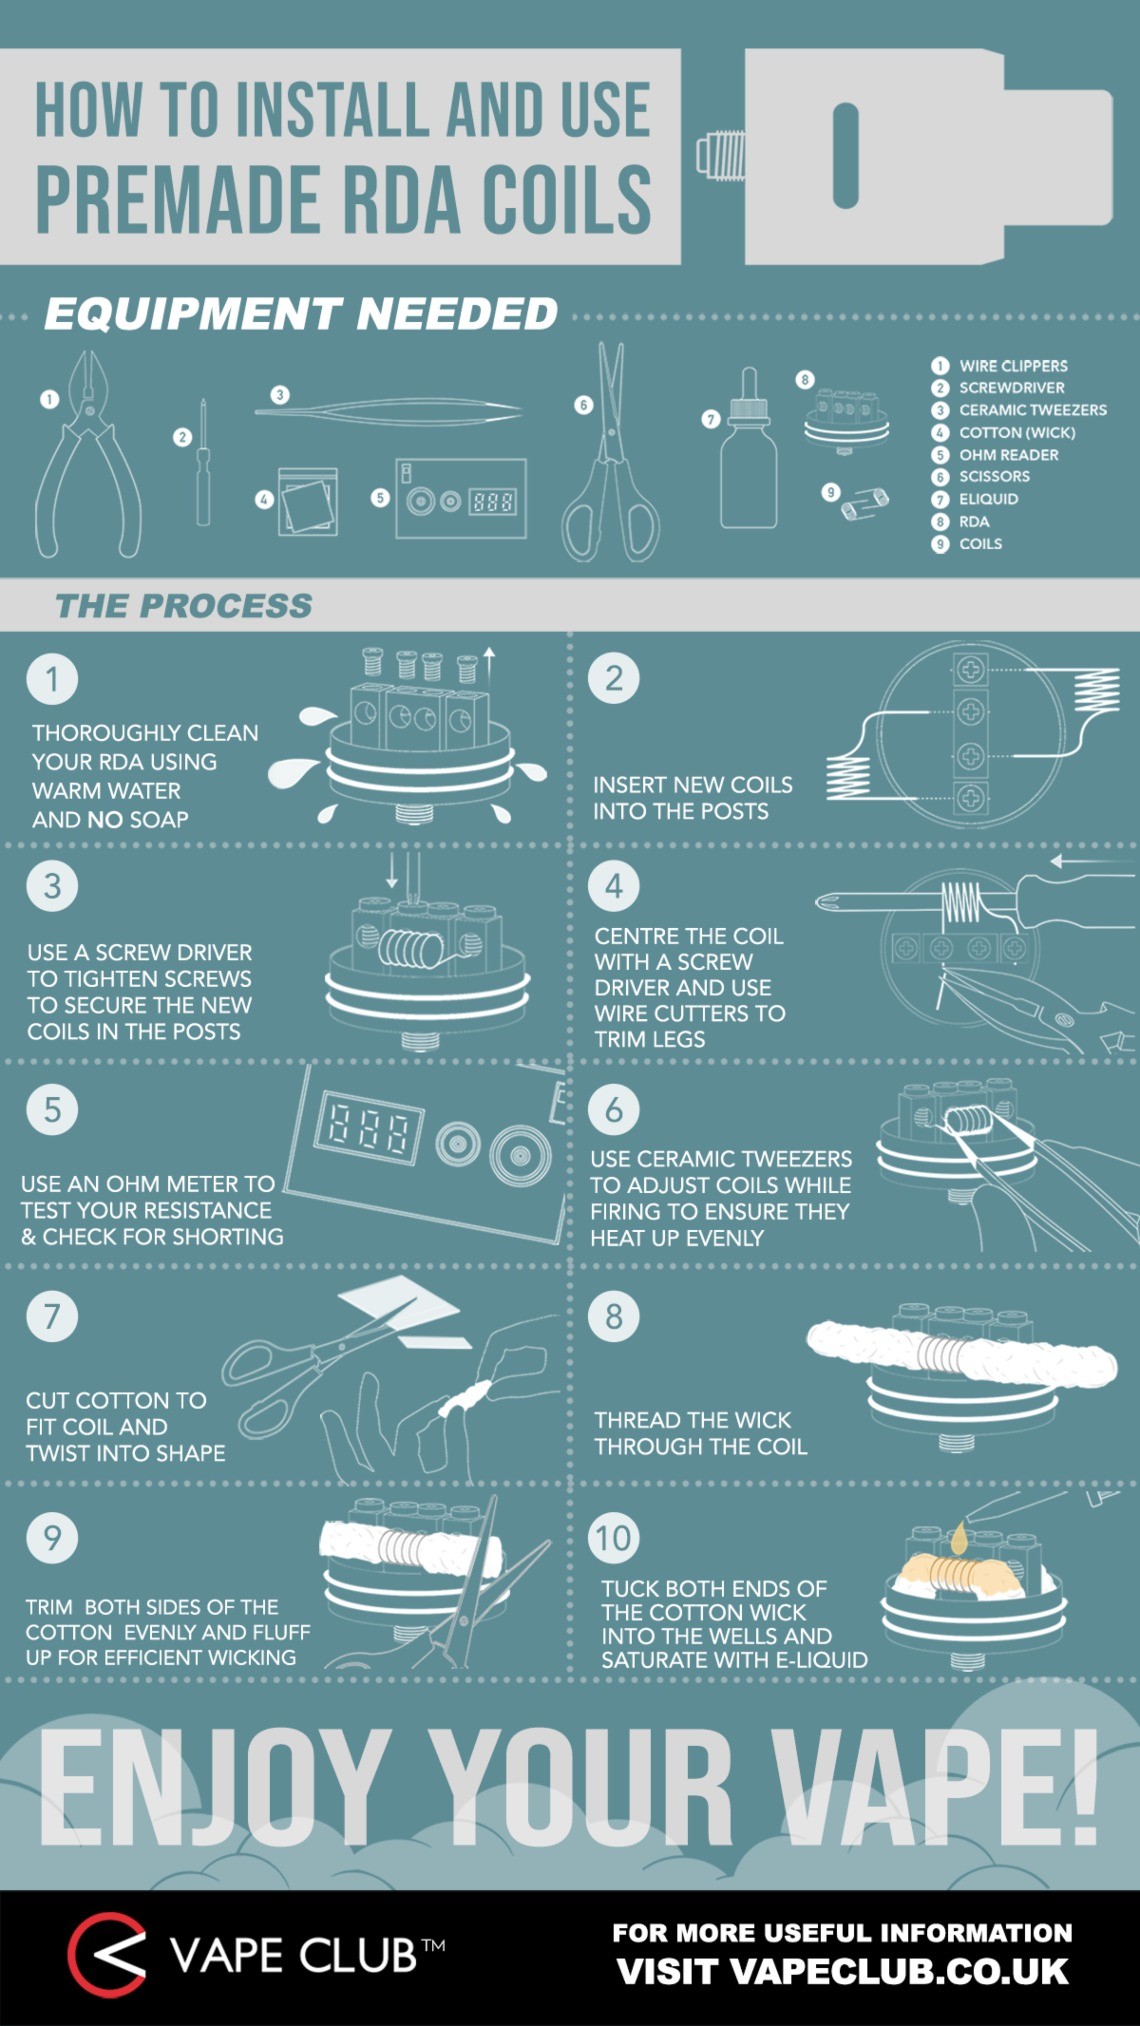
All you’ll need to do is select your RDA or RDTA, and use the following steps to install your pre-built coils onto the deck.

  1. Clean your RDA of e-liquid, removing the cotton and old coils.
  2. Select and prepare your new coils.
  3. Insert the new coils into the posts, and gently tighten screws to secure.
  4. Centre the coil with a screwdriver and use wire cutters to trim excess wire.
  5. Use an Ohm reader to check your resistance and make sure there are no shorting problems.
  6. While firing the coils, use ceramic tweezers to gently squeeze them to ensure the coils heat up evenly.
  7. Cut a strip of wicking material a similar size to the coil, then twist into shape.
  8. Insert the cotton through each coil.
  9. Trim any excess cotton evenly, whilst fluffing up for efficient wicking.
  10. Tuck both ends of cotton wick into the wells and add juice until your cotton is nice and saturated.

If you’d like to speak to us about Prebuilt coils, RDA’s, RDTA’s, or any of the other products on our website, please don't hesitate to contact our team.


How To Guides & Useful Information
How To Vape Guides

How To Vape Guides

Learn More ➲


Get 10% Off Your Next Order!

When You Subscribe To Our Newsletter.

Sign Up & Save